In this digital world, it may be hard for some to believe that there’s still a place for anything manual or physical – especially in the engineering realm. And, while it’s true that today’s technologies have cut into the dependence on physical testing, real-world data remains the lifeblood of the product lifecycle.
From product design to troubleshooting in-service equipment, next generation product planning, and all phases in between, testing remains critical to the design, manufacture, quality, performance, and evolution of virtually all products.
New Product Development
For centuries the process to create or enhance a product consisted of building and testing a long series of prototypes. This build it/test it/break it approach was generally repeated until a satisfactory design was identified. While effective, the process was both costly and time consuming — with these factors often limiting innovation.
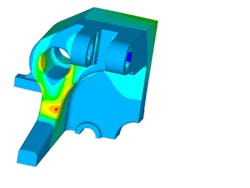
Since the late 1960s technologies such as Computer-Aided Design (CAD), Computer-Aided Engineering (CAE), and simulation, have continually evolved to lessen the dependence on physical prototype testing and thus shorten development cycles. These tools allow 3D representative digital models to be created and analyzed for manufacturability, performance, durability, and reliability at component, sub-assembly, assembly, and product levels.
READ MORE - From Drafter to Innovator: The Evolution of the Design Engineer
With up to 80% of a product’s total cost committed in the early upstream stage, design is the optimum place to locate and correct potential geometry, performance, and manufacturing flaws. Simulation not only removes much of the cost and time associated with the building and testing of multiple prototypes, but product innovation is enhanced as designers now have the time to explore design iterations.
Principals from Six DoF Testing & Analysis pioneered many of the testing tools, processes, and methodologies that are now standard. The company’s Senior Engineer Garth Wiley explains that while the impact of these digital tools cannot be overstated, this does not diminish the value of testing. In fact, over the past several decades, testing is largely responsible for the evolution and advancement of such tools.
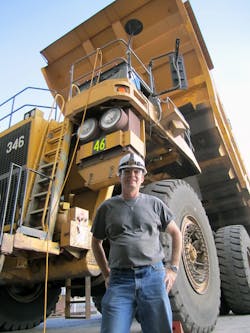
“Data collected from products operating in their natural environment provides the baseline for these digital tools. Equipment operating in mining or construction environments, for example, is instrumented with sensors to capture exact loads, stresses, and conditions to which these products are routinely subjected. This data is used to drive simulation models and analysis tools to predict if a new or modified design, material choice, or application will meet performance targets,” said Wiley. “With even a relatively small sample set, engineers can project the performance of that equipment, structure, machinery, etc. over its projected life. This provides designers and manufacturers with a quantifiable understanding of the viability of that product design.”
It’s safe to say that in the foreseeable future testing and data collection will continue to develop an even greater interdependence.
Non-Destructive Testing
One can verify that a part, product, or structure meets certain standards in many ways. For example, a car crash test is an example of a testing method where that being tested is destroyed. While this is acceptable for prototype testing, it is not acceptable for in-service equipment or parts coming off the manufacturing line.
Non-Destructive Testing (NDT), also known as Non-Destructive Evaluation (NDE), includes a variety of analysis techniques used to evaluate the properties of materials, parts, or systems without causing damage. NDT is widely used in maintenance, certification, safety, or verification scenarios or in a manufacturing environment to verify that a part meets quality standards before being shipped to the OEM or customer.
There are several forms of NDT including Eddy-Current, Liquid Penetrant, Magnetic-Particle, Radiographic, Ultrasonic, and Vibrational testing. Visual inspection is another form of non-destructive testing. There are also several variations/special techniques for some of these methods that can apply to certain applications.
These methods are routinely applied in industries where failure would result in significant hazard or economic loss. Examples include product quality inspection and weld integrity verification.
Weld Verification
NDT is a common practice used to verify weld integrity for vessels and other structures and in-service equipment found throughout the aerospace, automotive, industrial manufacturing, petrochemical, and power generation industries. This form of testing helps to ensure that the weld has the strength to do the job for which it is intended. For example, lawn mower decks contain structural welds that are designed to withstand vibration up to a specific level. But welds on a bridge structure are more critical. Manufacturers must be sure that the weld can handle tremendous loads and move without cracking.
Professional NDE Services Group offers third-party assistance for all NDT methods. The company’s emphasis is on responsive, reliable, and professional customer service and its services include Level 3 services, training, audits, and Best-Practice implementation. The company’s Business Development Manager Mark Koehler says that weld failure can be traced to any number of areas.
“Weld failure is often traced to over-cycling, over-stressing, it might also be simply under-designed. Or in other words, the engineering wasn’t correct on the front end. Improper weld technique can also cause failure — such as if the weld hasn’t properly fused to the base material. Obviously, any inherent defects that are present in the weld can propagate and cause the weld to crack or otherwise fail.”
Koehler sums it up by explaining, “Weld failure can be traced to any number of areas from engineering, design, and materials, to processes, conditions, or workmanship. Non-destructive testing allows welds to be evaluated before failure can occur.”
Product Quality Testing
When defective products are allowed to leave the manufacturing facility, the results can be catastrophic. At a minimum, customer complaints and scrap rates are increased; but poor quality can also lead to excessive warranty claims, lost contracts, or even litigation. Quality inspection testing is used at the manufacturing stage to detect structural flaws or to validate conformance to customer specifications before that product leaves the manufacturing floor.
This form of testing provides consistent and objective testing that is rooted in science and replaces manual processes that are open to subjective interpretation. Relying on the judgement of even the most experienced quality inspectors to determine what is acceptable (or not) as products roll off the production line creates opportunity for errors. When human judgment or emotion is at the center results can vary from one inspector to the next or from one day to another.
However, removing subjective interpretation from the equation is not always easy. For example, supplier requirements might call for the product to satisfy any number of specific design and performance specifications and be free of other objectionable noises. But how does one quantify what is objectionable?
Fortunately, technology has emerged that allows suppliers to inspect every part that they manufacture to identify flaws and ensure conformance to rigid specifications.
READ MORE: Subjective Quality Testing is Becoming a Thing of the Past
Quality inspection must be repeatable, consistent, metrics-based, and above all “objective.” Because of this, many suppliers rely on automated end-of-production quality inspection technology from Signalysis to verify that parts are defect free. As a provider of testing systems, the company has built a reputation on detecting product flaws and protecting the reputation of its manufacturing customers.
This thorough, highly technical, and systematic approach begins by gathering customer specifications. This could be anything from specific failure modes – such as ticking in a motor, excessive noise or rattling, modal parameters for rotors or an OEM’s general specification to the non-descript ‘other objectionable noises’ catch-all. The next step is to acquire baseline data on a sample of parts to help quantify and differentiate acceptable from non-acceptable. Ideally these test parts represent the full range for each failure mode including those that do not meet quality standards, borderline parts, and acceptable parts.
Equipment Troubleshooting
Field troubleshooting or problem-solving is another form of testing. When a key piece of equipment, such as an industrial motor, fan, or generator is down, fast and decisive corrective action is critical. Testing is used to not only identify the cause of the problem, but to evaluate and determine the best corrective steps.
For example, rotating equipment, with its multiple components and sub-assemblies, is subjected to varying vibrational forces. While certain levels of vibration are inherent to the normal operation of pumps, fans, gen-sets, and similar equipment – sometimes vibration levels become excessive. As vibration increases, equipment and supporting structures are susceptible to cracks, fatigue, and catastrophic failure. This puts machinery, production, and worker safety at risk.When troubleshooting rotating equipment, it’s important to quickly determine the root cause of the problem(s). A cracked fan blade, bent shaft, or crumbling foundation may or may not be the result of poor design, manufacturing, or installation. The culprit could be vibration originating from the unfavorable dynamic interaction of otherwise good systems or components.
When troubleshooting rotating equipment, it’s best to adopt a system-level approach. Because each subassembly is generally designed and manufactured independently, little consideration may have been given to its interaction with other units when installed as part of a larger system. Premature wear, excessive or abnormal maintenance, high vibration and/or structural cracking are indicators of a serious, potentially catastrophic issue that should be addressed immediately.
When symptoms of potential issues first appear, testing can quickly identify the cause of the problem and recommend a solution that will allow the equipment to continue to operate at peak efficiency.
The Future of Testing
There’s no question that engineering analysis, simulation, and similar technologies have had an impact on testing. Product development cycles and associated costs have been reduced as the number of physical prototypes needed to validate next generation products has been reduced significantly.
However, as today’s digital infrastructure and collaboration tools evolve, testing will continue to adapt to fully leverage these (and similar) technologies. Expanded Internet bandwidth and greater cloud data storage, along with advancing sensor, Bluetooth and imaging technology, will ensure more economical uses of the test engineer’s time to provide the data that drives simulation and validates product designs.
“In a growing number of cases we’re able to leverage a customer’s in-house resources without the time and expense to send test engineers onsite,” said Wiley. “Through today’s hi-def imaging and collaboration applications we’re able to guide test setup, collect data, and monitor tests remotely. Test data can be uploaded to the cloud and reviewed in real time. Similarly, we’re now able to monitor mobile structures for large channel count, for longer durations, and at higher frequency requirements. Capturing displacement, vibration, and stress without the need to be physically onsite.”
While no one can predict what the next few decades will bring, it’s safe to say that in our physical, mechanical, physics-based world, there will remain a need to identify flaws, ensure structural integrity, troubleshoot problems, and provide the real-world data needed to confidently design tomorrow’s products.
This article was written and contributed by Robert Farrell, President of Farrell MarCom, LLC, and Co-Founder of Revolution in Simulation.Org.
